 3D Shed Builder

Have you crammed your son’s hockey gear, three bikes, and your lawnmower into the garage for far too many years? Maybe you’re dreaming of a place to store kayaks or gardening supplies that never quite fit anywhere. You might even find yourself buying tools a second time because you can’t locate the ones you already own. When your garage becomes a catch-all, you lose usable space—and patience—trying to make everything work.
At Gigglin’ Pig, we offer more than fifty in-stock sheds for sale & structures to explore, but you don’t have to settle for something in stock. With our 3D Shed Builder, you can design a structure that fits your space, storage needs, and budget. You can adjust the size, choose door and window placements, and add shelving—all while keeping an eye on the overall cost. There are no surprises when it’s time to build.
In case you have any questions about the process, here’s our step-by-step shed builder guide.
Step 1: Click “Design Your Shed.”
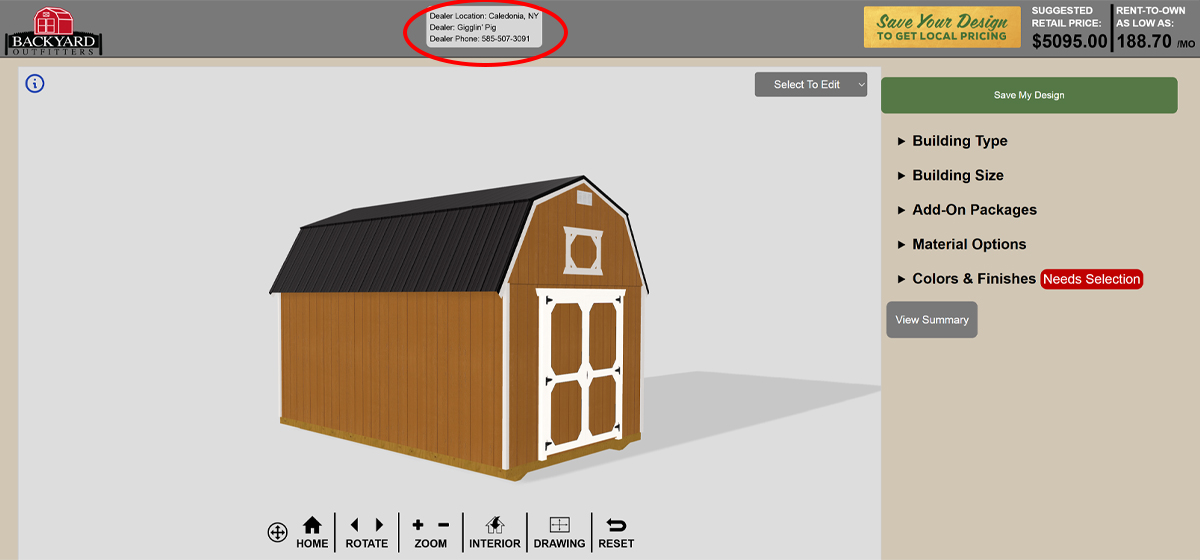
You can find the 3D Shed Builder in several places. In addition to the link in the introduction, you can return to our home page’s “Design Your Shed” button. From there, you’ll be redirected to Backyard Outfitters. You can verify where your structure request will be sent by checking the top of the page.
Step 2: Choose a Building Type
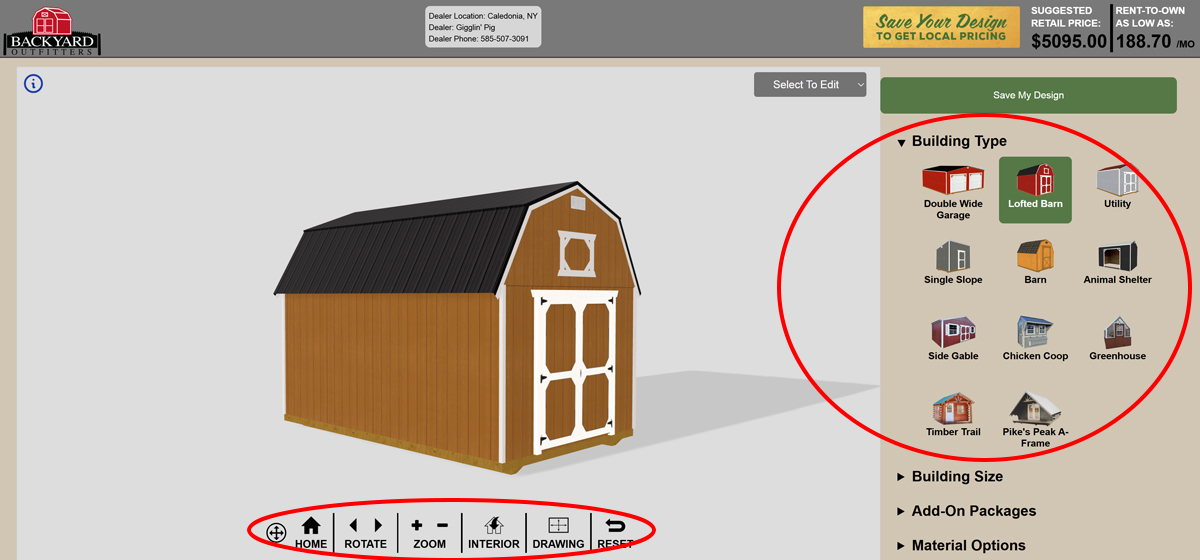
Click on the arrow or the words “Building Type.” You’ll see several options, such as Double-Wide Garage, Barn, and Greenhouse.[1]
Below the image of the structure are tools to help you view it more clearly. You can
- Rotate the building to see door and window placement,
- Zoom in for a closer look,
- Switch between interior and exterior views,
- Switch to a Drawing view to see the layout, and
- Reset features like windows, doors, and siding.
[1] At the time of writing this shed builder guide, you may run into issues if you select Timber Trail or Pike’s Peak A-Frame. If you encounter this problem, please call our representatives at 585-507-3091 for help.
To see a larger webpage with descriptions of these buildings, check out our guide.
Step 3: Choose a Building Size
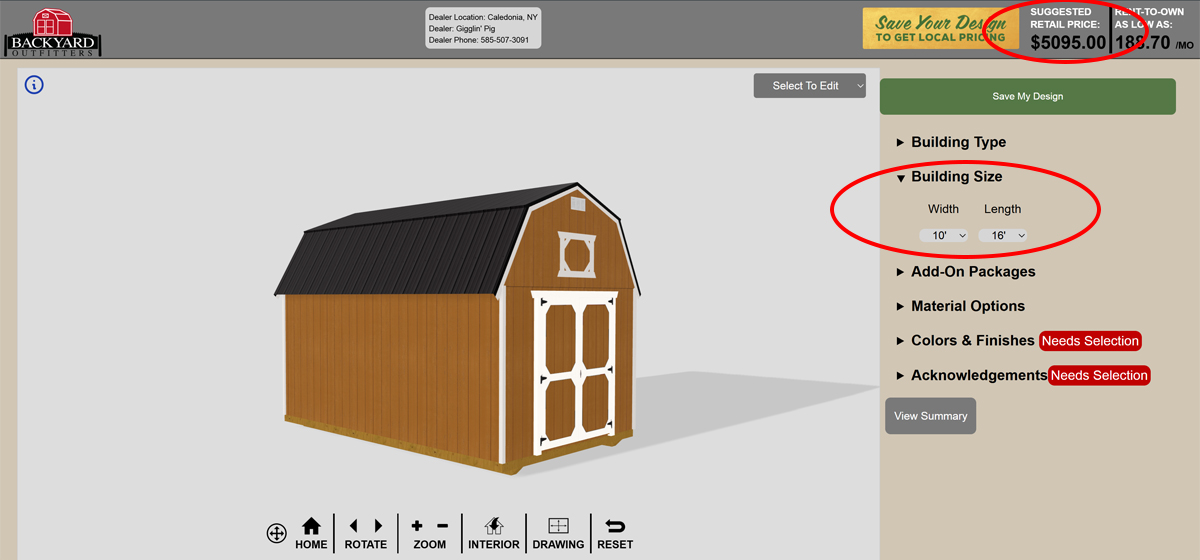
After choosing your building type, you can select a building size. The program defaults to common sizes, but you can adjust them if you need more room for a larger lawn mower or a smaller footprint for a tight lot.
As you make sizing changes, you’ll see how they affect the price. In the upper right-hand corner, the Suggested Retail Price updates as you go. This allows you to track how adjustments increase or decrease the overall cost.
Step 4: Choose Options
At this step, you might see Add-On Packages and Material Options. Each structure comes with slightly different options.
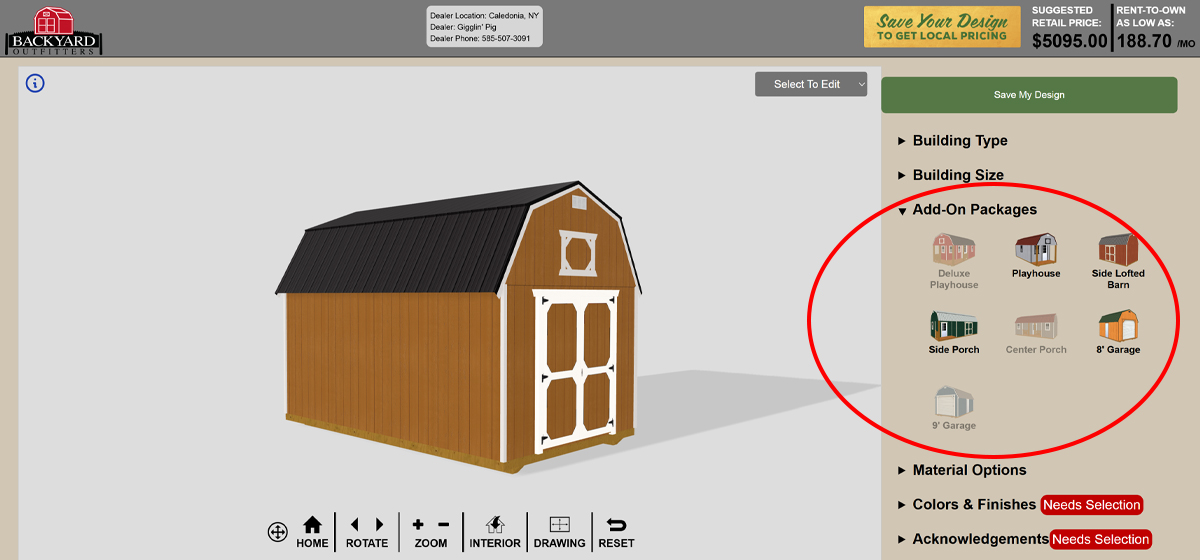
The Utility Shed is especially versatile, offering add-on packages such as dormers, side porches, and side orientations. With a lofted barn, you can change the building’s orientation by relocating the door or adding a porch. With many structures, including the Double Wide Garage, you can opt for double flooring in the Other Options Tab.
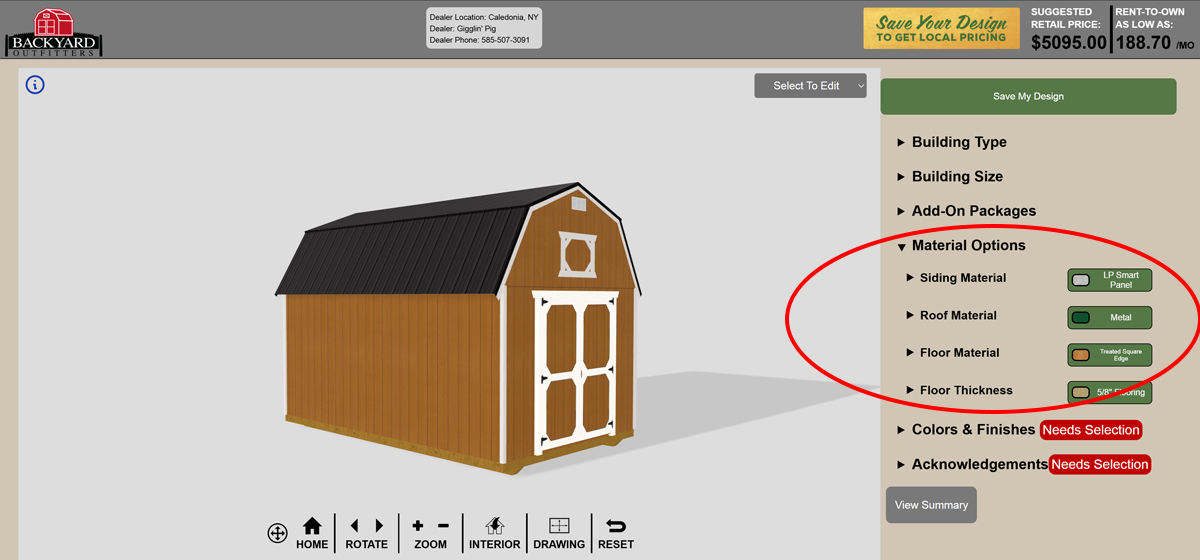
With nearly every building, you can customize roof and siding materials. Choose a natural look with T1-11 Pressure Treated Siding, or opt for vinyl siding, which doesn’t require repainting.
Step 5: Colors & Finishes
After choosing your building and siding type, you’ll see a specific set of colors that correspond with those materials.
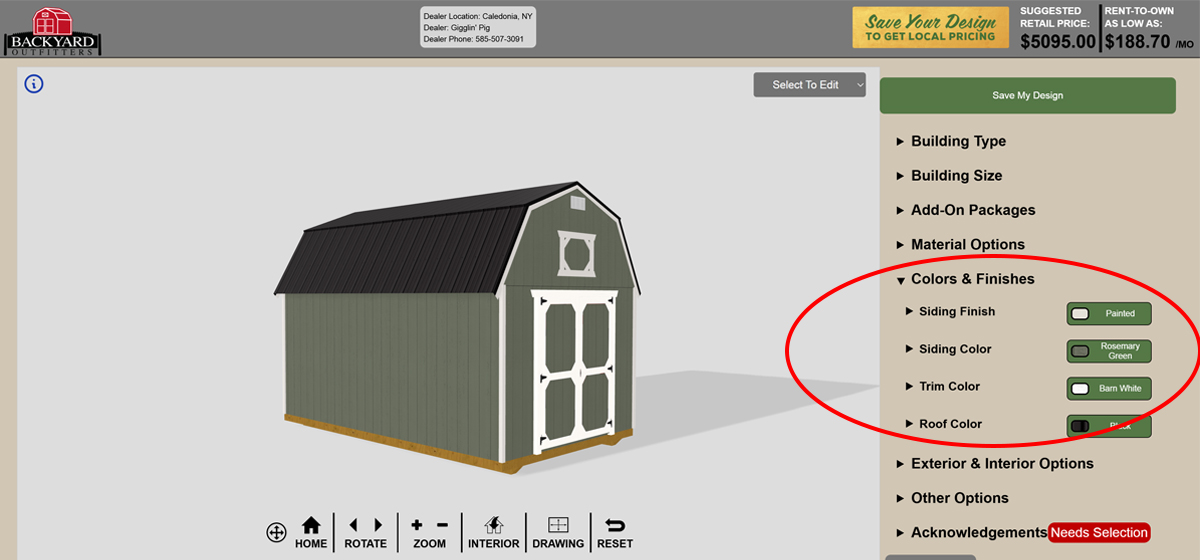
You can view these as a palette halfway down our Models page if you’d like to see them in a different setting. You can also experiment with different color combinations. Keep in mind that trim and roof colors affect how your siding appears. Many of these options are also shown in high-quality photographs of our in-stock sheds.
Step 6: Exterior & Interior Options
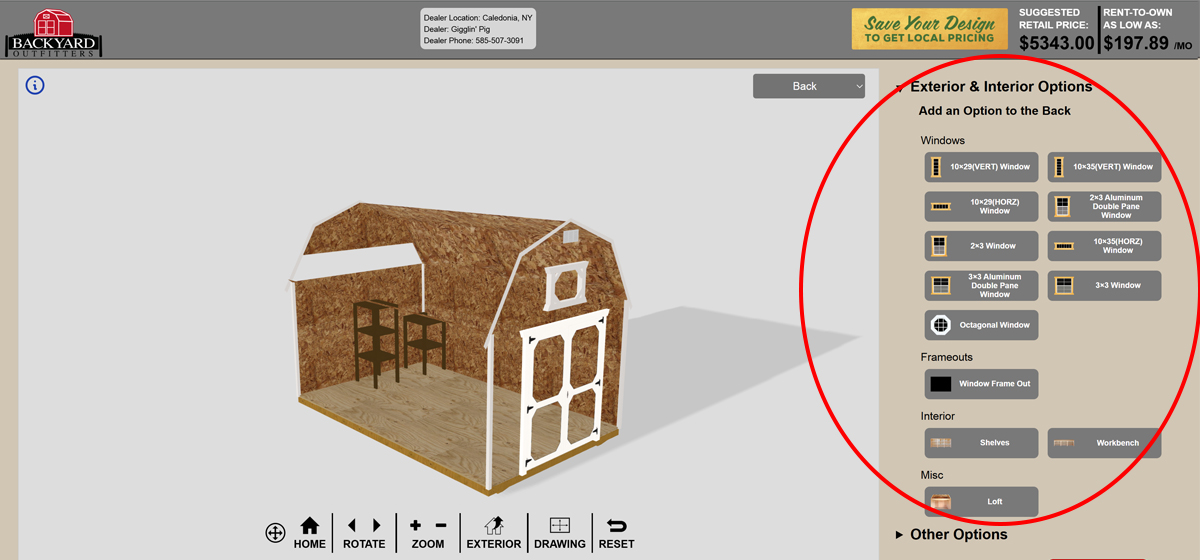
This step gives you the tools to make the structure work for your needs. In Exterior & Interior Options, you can change exterior features such as door types, garage options, and windows. For studios, workspaces, and playhouses, framing windows can give the space a more finished look.
You can also add interior features like workbenches and shelving. For potting sheds or sports equipment, shelving can save significant time later.
Before adding features, specify which side of the building you’re editing. Above the image of the structure, to the right, click the drop-down arrow next to “Select to Edit.” This orients the structure so you can clearly see which side you’re modifying.
With the Utility Shed, you can adjust roof pitch, floor joist width, or even request that one door be left unpainted.
If you change your mind, don’t forget the Reset button will return many features, such as windows, to their default settings.
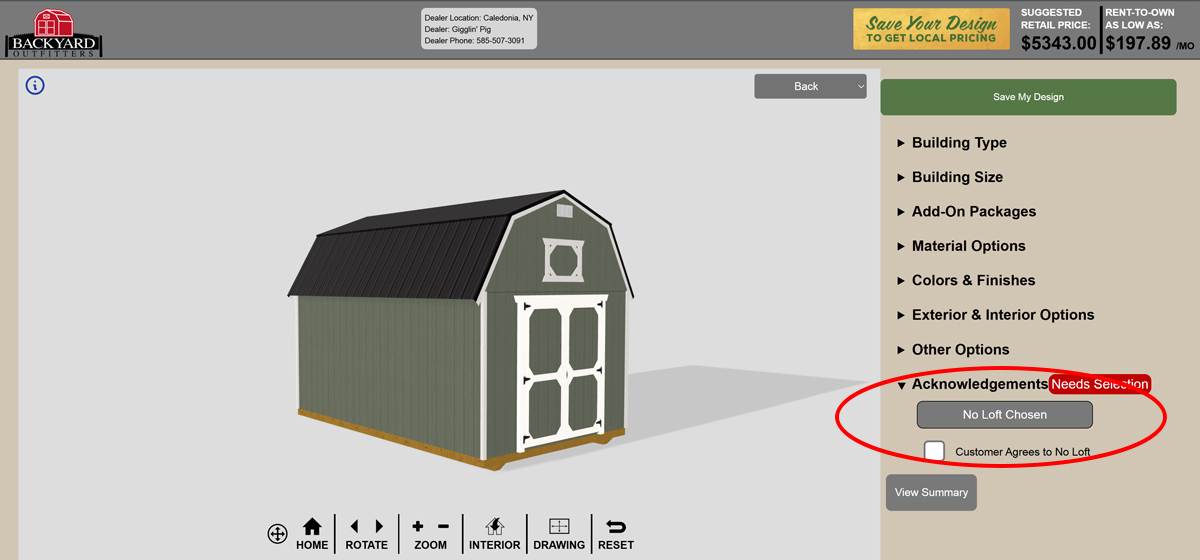
Step 7: Acknowledgements
If you’ve made it this far, congratulations—you’ve completed the first step in creating your custom structure! The remaining steps are simple. In this section, you’ll review statements addressing aspects of your structure that are commonly misunderstood. Once you’re comfortable, check the white box to acknowledge each item.
Step 8: View Summary and Save Design
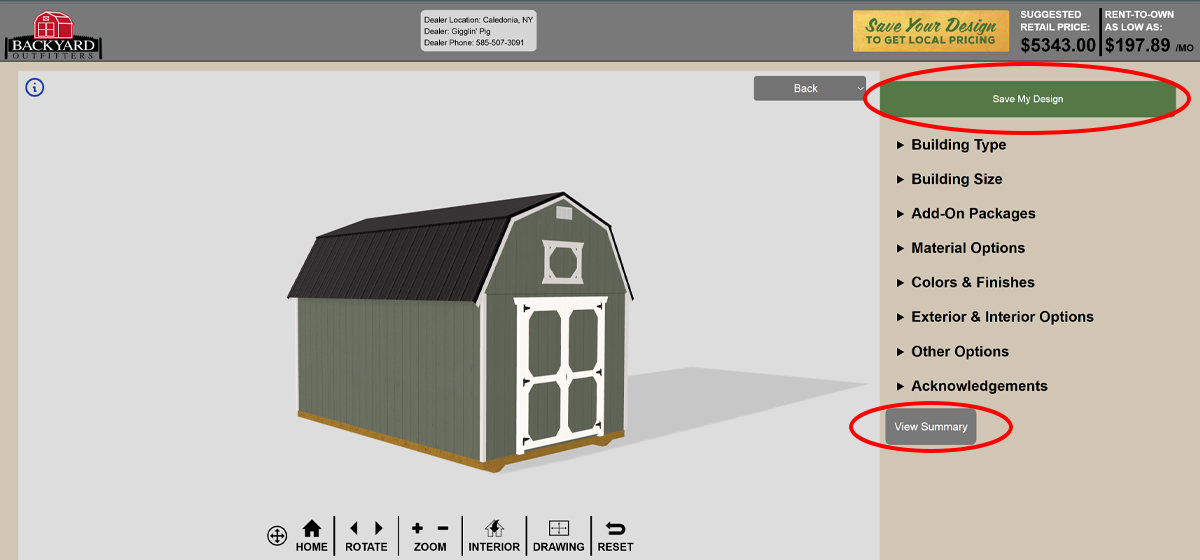
To finish, click “View Summary.” This pop-up allows you to double-check your customizations and confirm that you’re requesting a quote for the building you want.
When you’re satisfied, select the green “Save my Design” button at the top of the page. You’ll be prompted to enter information, including your email. Gigglin’ Pig will then review your request and email your quote.
Step 9: Contact Us
By now, you’ve explored the 3D Shed Builder and may have submitted a design for a quote. What’s next?
Because you’ve already reviewed features, colors, sizes, and options, you can speak with our sales team confidently. If you know you want a building, get in touch with us. Call 585-507-3091, email sales@gigglinpig, message us through our website, or stop by—we’d love to discuss your plans.